How to set up row- and column-level permissions in Redshift (and your Business Intelligence tool)


Row- and column-level permissions on the database level are a way to control the access to data that certain users or groups in your data warehouse have. Database level permissioning can be implemented in most data warehouses, and it can be used for:
Column-level permissions: Restrict access to sensitive columns of data, such as PHI (protected health information) and PII (personally identifiable information, such as names, social security numbers, and addresses)
Row-level permissions: Restrict access to sensitive rows of data
Masking: Transform data so that it looks different to how it originally looked, such as by encrypting or hashing entries of columns that contain PII
Implementing these policies at the database layer allows you to enforce these rules in a business intelligence tool as well as other tools that rely on the data warehouse. We’ll be showing an example of how to enforce database-level permissions using Amazon Redshift and how you can use it to enforce security and protect PII in a business intelligence tool– in our case, Hashboard.
Configuring column-level permissions in Redshift
In order to get basic column-level permissions working in Redshift, you'll need access to Redshift and have admin privileges. In our case we'll use the the Redshift query editor.
There are a few main steps:
Create a new user, which will be have more restrictive permissions.
Use the GRANT command to assign schema usage access
Use the GRANT command to assign SELECT access to only the columns that we want it to be able to access
Verify that our new user has the correct access by trying to SELECT *
I’m using the Redshift sample database users table, which has columns like firstname, lastname, email, and phone that contain (fake) PII. Let’s see how to set up column-level permissions to exclude those sensitive fields.
First, using my superadmin account, I created a new user called column_restricted_redshift. Read up more on creating new Redshift users here.
CREATE USER column_restricted_redshift PASSWORD <my password>;Next, it was time to give the user permissions using the GRANT command. I started by giving it access to the schema containing the tables I wanted it to be able to access.
GRANT USAGE ON SCHEMA public TO column_restricted_redshift;There’s a lot you can do with GRANT in Redshift – including implementing row-level security to restrict certain rows from being accessed based on rules that you can set up, and dynamic data masking to obfuscate table entries. For now we’re just going to focus on columns.
I used the GRANT command to assign column-level permissions to this user so that we’d restrict access to fields with PII, like names, addresses, and phone numbers.
GRANT SELECT(
  userid, city, state, likesports, liketheatre, likeconcerts, likejazz
) ON users TO column_restricted_redshift;
In order to check that the column-level permissions were working as intended, I ran the SET SESSION AUTHORIZATION command to temporarily set my session to use the restricted user’s authorization. This allows us to verify that when our column restricted user tries to SELECT from user, it’s only going to grab the columns we want it to:
SET SESSION AUTHORIZATION 'column_restricted_redshift';
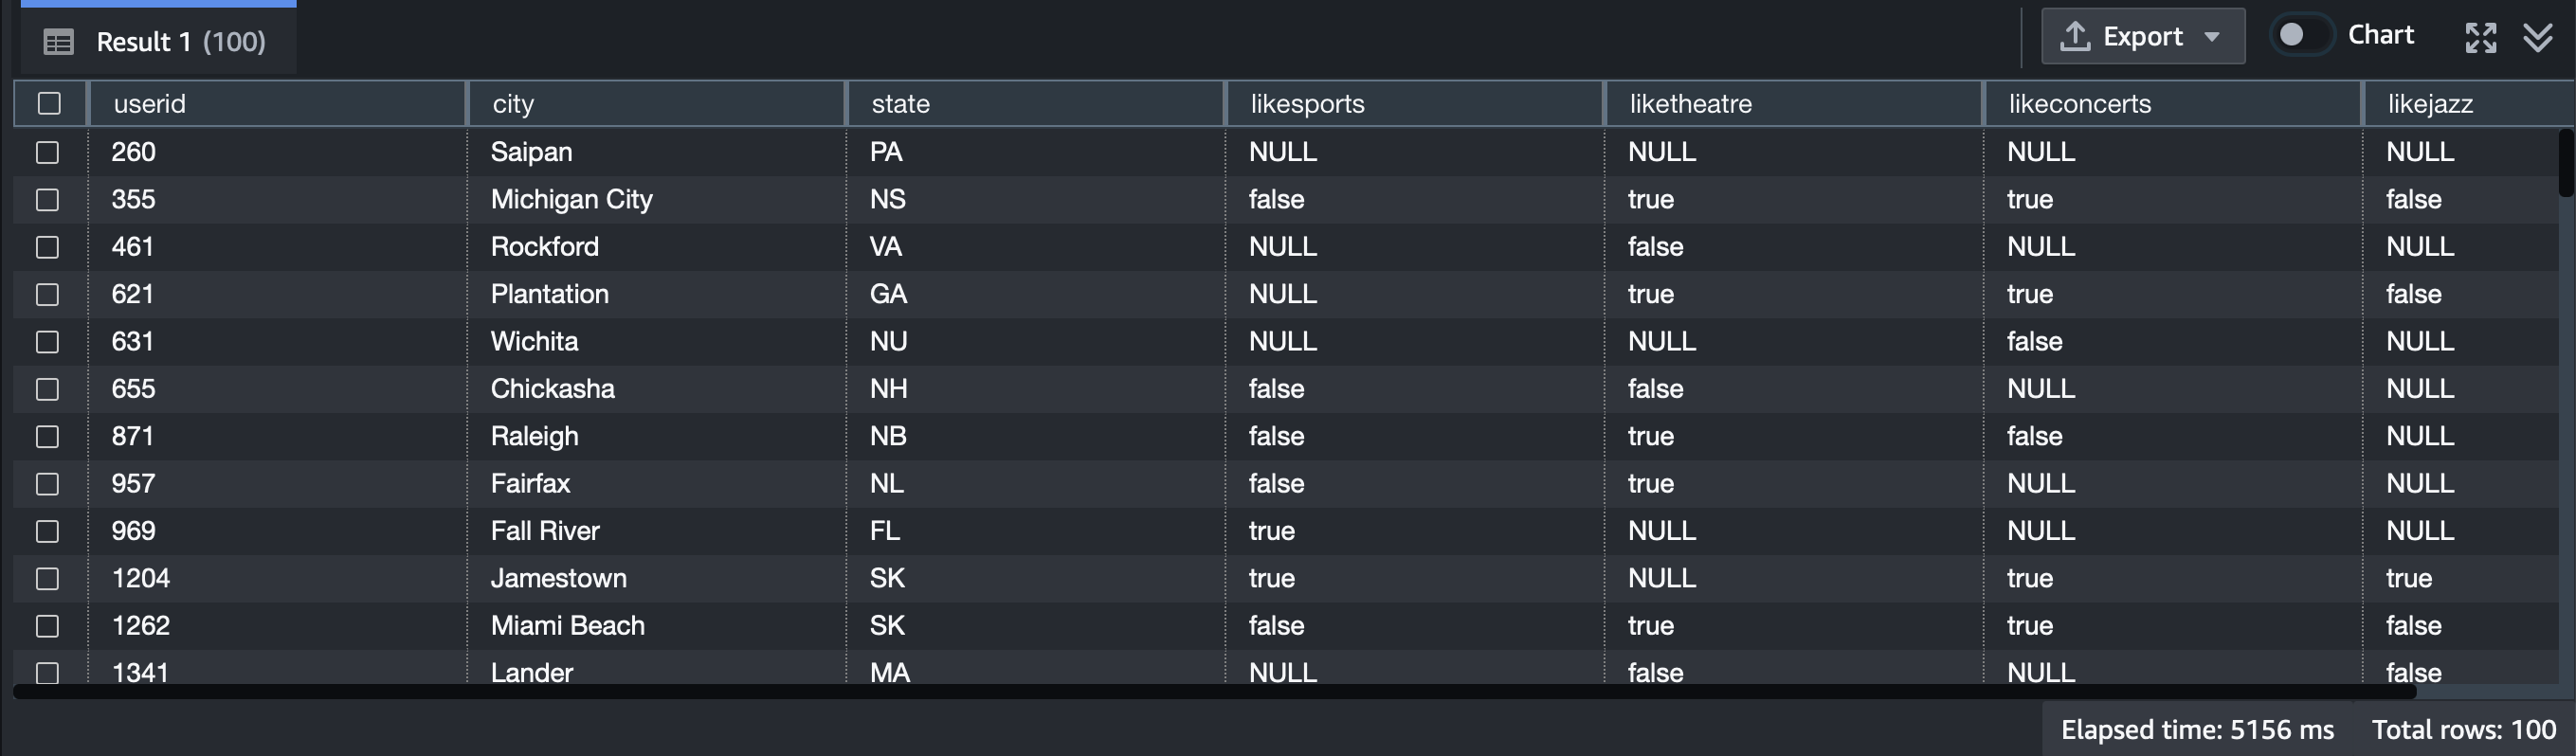
SELECT * from users;
RESET SESSION AUTHORIZATION;Peeking at the table preview, we can see that we’re getting the columns we want–userid, city, state, likesports, etc.–without the columns we’ve restricted, like firstname, lastname, and address.
Configuring column-level permissions in Hashboard
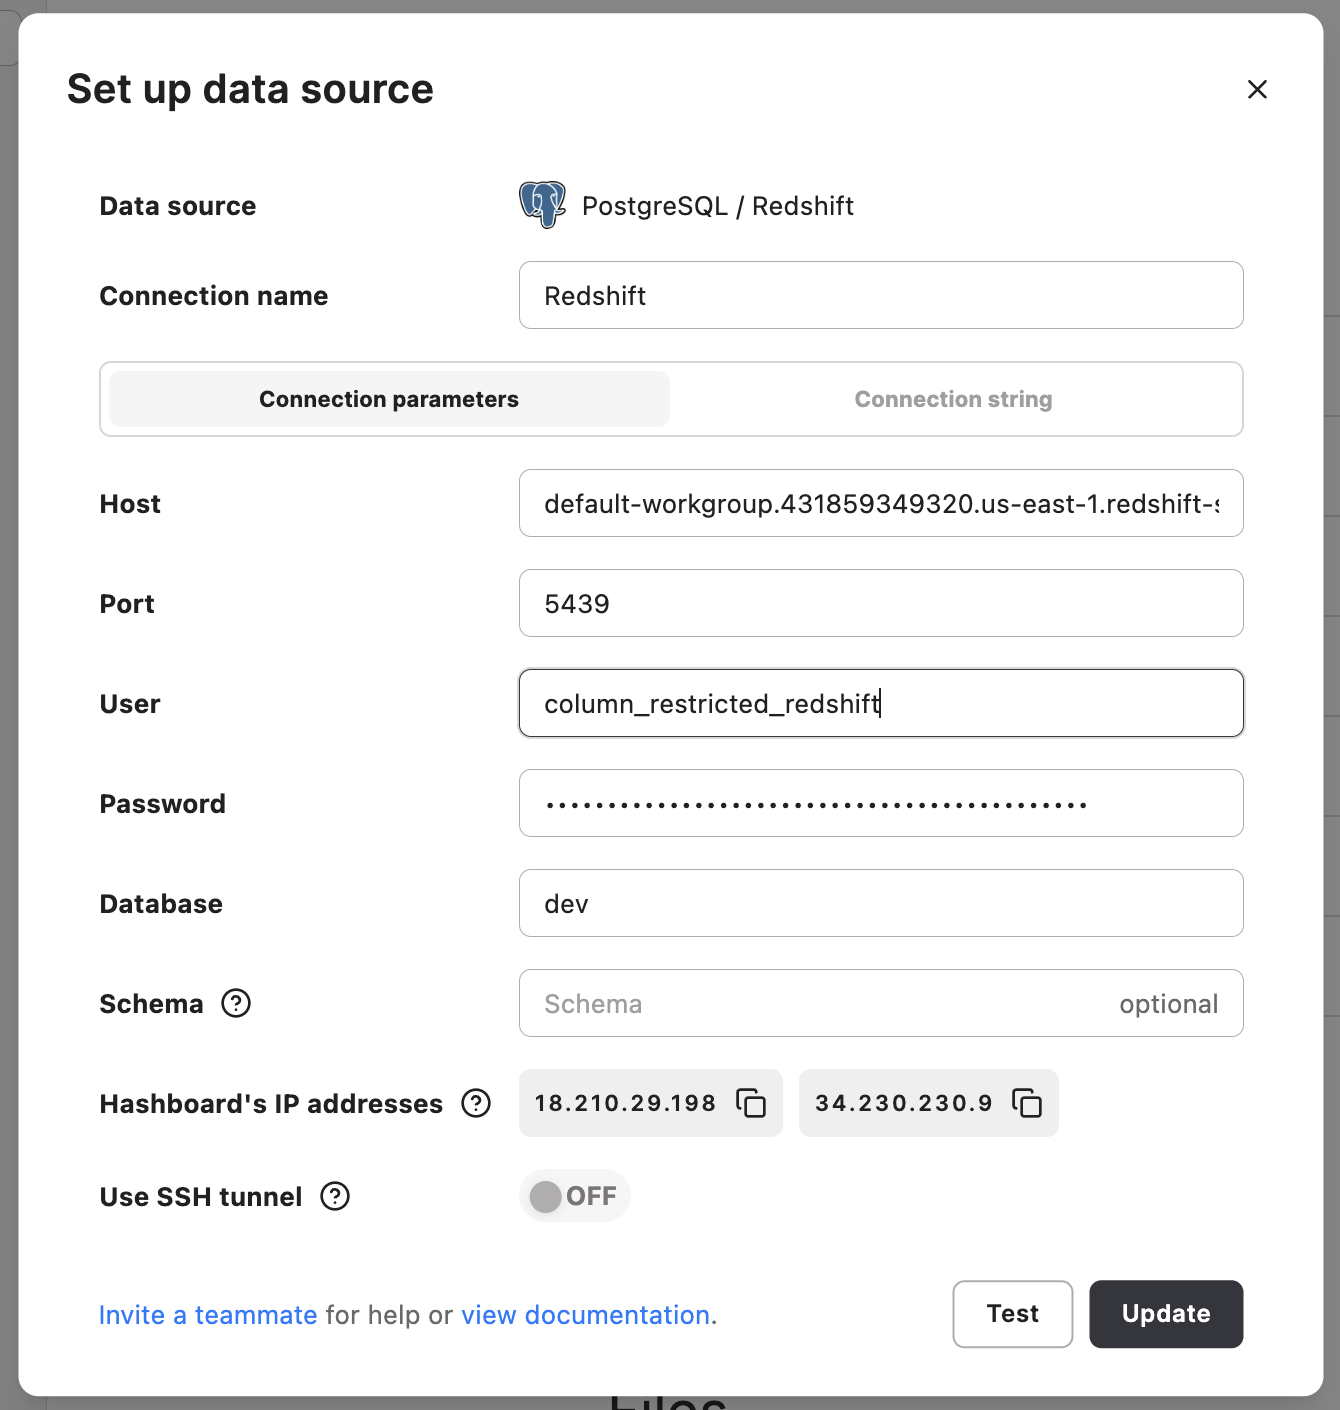
Once I saw that everything was working the way I wanted it to, I hopped into Hashboard. I clicked into the Data sources page and then selected Add data connection, at which point I chose PostgreSQL/Redshift as my data source.
For every data connection you set up, Hashboard allows you to fill out a “default” credential, and then if you want, connect additional credentials for that same data connection. You can then map the additional credentials to different roles in Hashboard.
The “default” credential is going to be what users are assigned to if they’re not in any roles that are assigned other credentials. It’s also the credential that will be used in public links, if you choose to enable them.
It's important to make sure that the default credential is the one that’s most restrictive, with the least sensitive information. For us, that’s going to be our column_restricted_redshift user.
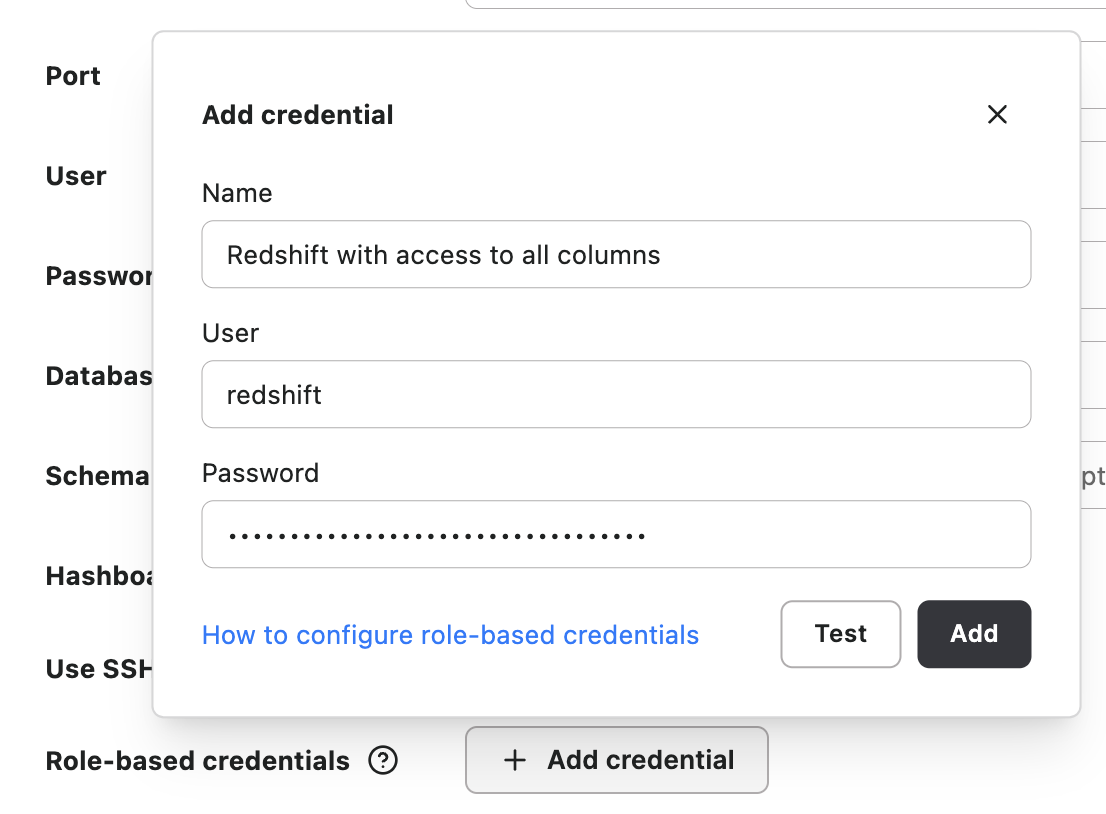
 When we’ve done that, we’re going to scroll down to Role-based credentials, where we click on + Add credential and fill in just the username and password of the Redshift user that has access to all of the columns in our table. You can find Hashboard’s documentation for role-based database credentials here.
 Now, we’ve successfully created two credentials, but until we actually assign them to any Hashboard roles, everyone in our project will be using the default credentials, with the name and address columns restricted.
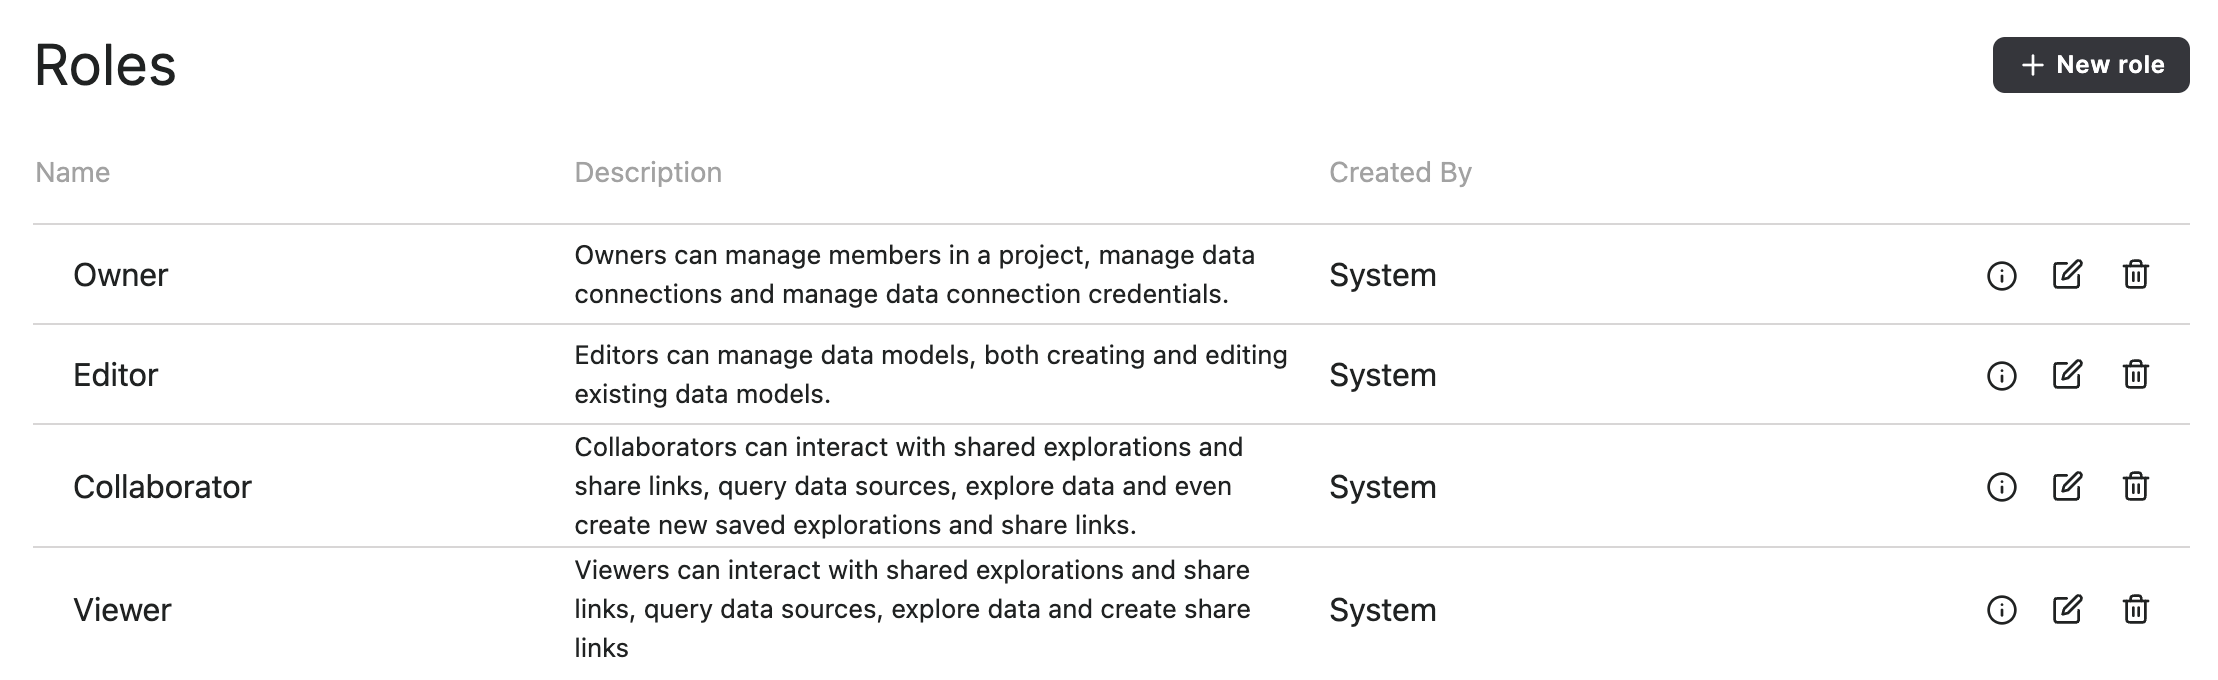
In my project, there are currently four roles that I can assign to my users – Owner, Editor, Collaborator, and Viewer. Because I created this project, I’m an Owner; new users that join will automatically be Viewers. For now, let’s say I want to add the higher-level access Redshift credential just to my Owner and Editor roles.
 If I edit the Owner role there are lots of different permissions I can configure; focusing on Role-based credentials, I click the + Add button, select my “Redshift” connection from the dropdown, and then click the name of the credential I’d just created, “Redshift with access to all columns”.
Now we’ve successfully gotten column-level permissioning working in Hashboard.
Creating charts and dashboards using column-level permissioning
Using my Owner account, I’ll set up a data model in Hashboard modeled off of the Users table, adding in all of the columns as attributes. From there, I made two saved explorations: one table that showed cities sorted by the number of users that were sports fans, and one that included the names, phone numbers, and emails of sports fans in our top city, Charleston.
I created a simple dashboard out of both of these titled “Top sports fans by city”.
Logging in as a viewer with restricted access, though, the same dashboard looks different. We can still see the table of sports fan users by city, because city and likesports aren’t restricted columns, as well as the total users row count.
But permission is denied to select fields such as firstname, lastname, phone, and email, because from the viewer’s perspective, these columns don’t even exist in the table at all.
Hashboard’s hierarchy of users, roles, and data source credentials makes it easy to integrate column-level permissioning into your project at every level: from data models to saved explorations to dashboards. After following these steps, there’s no additional work to do– these permissions are enforced on every resource.
 Hashboard’s hierarchy of data sources, credentials, roles, and users